


Popups and Browse Windows Part VI
Dialog Windows Part 2


As described in Part 1 of Dialog Windows, Popups and Browse Windows Part V, the elements appear top to bottom in the order they are entered in the description.


In the popup dialog window image at the top of this article, all elements appear inside a cluster (a framed container with text) with the name APPROVED. Without ten view elements (invisible containers) the elements would appear top to bottom as static text, field, static text, field, static text, field, etc. To get the static text on the left, and the corresponding field on the right, each static text-field combination (static text-field-button in the case of Calendar:-11/01/2025-CALENDAR) is enclosed inside a view. These elements would also appear top to bottom if the align_children property of the view elements was left to its default. Instead, the align_children property is set to align_row.
align_row: Distribute the contents over the parent's width with a consistent baseline.

Build The Dialog
As in the previous article, you can follow along and test the scripts by copying and pasting them into the console, then running them in the console.

Here's a dialog containing:
First Name static text.
A text field for entering first name.
Last Name static text.
A text field for entering static text.
An ok_cancel button.
With no view elements, the elements above will appear top to bottom. Empty lines are used to make it easy to follow each element.
var dlg={description:{
elements:
[

{
type: "static_text",
name: "First Name:"
},

{
type: "edit_text",
width: 200,
},

{
type: "static_text",
name: "Last Name:"
},


{
type: "edit_text",
width: 200,
},

{
type:"ok_cancel",
}
]
}};
app.execDialog(dlg);
To put the static text elements to the left of the text fields, put each pair inside a view element and set the align_children property to align_row. The text that has been added to the script above is in bold.
var dlg={description:{
elements:
[
{
type: "view",
align_children: "align_row",
elements:
[

{
type: "static_text",
name: "First Name:"
},

{
type: "edit_text",
width: 200,
},
]
},

{
type: "view",
align_children: "align_row",
elements:
[
{
type: "static_text",
name: "Last Name:"
},

{
type: "edit_text",
width: 200,
},
]
},

{
type:"ok_cancel",
}
]
}};
app.execDialog(dlg);
The static text can be made bold by setting the font property to dialog and the bold property to true. Additional text from the script above is bold.
var dlg={description:{
elements:
[
{
type: "view",
align_children: "align_row",
elements:
[

{
type: "static_text",
name: "First Name:",
font: "dialog",
bold: true,
},

{
type: "edit_text",
width: 200,
},
]
},

{
type: "view",
align_children: "align_row",
elements:
[
{
type: "static_text",
name: "Last Name:",
font: "dialog",
bold: true,
},

{
type: "edit_text",
width: 200,
},
]
},

{
type:"ok_cancel",
}
]
}};
app.execDialog(dlg);
Clusters
To demonstrate how to make clusters, which are almost the same as views, the only changes to the script above are:
Changing the two view words to cluster.
Adding a name property (My Cluster) to the second cluster. The first cluster will appear without text (additions and changes in bold):
var dlg={description:{
elements:
[
{
type: "cluster",
align_children: "align_row",
elements:
[

{
type: "static_text",
name: "First Name:",
font: "dialog",
bold: true,
},

{
type: "edit_text",
width: 200,
},
]
},

{
type: "cluster",
align_children: "align_row",
name: "My Cluster",
elements:
[
{
type: "static_text",
name: "Last Name:",
font: "dialog",
bold: true,
},

{
type: "edit_text",
width: 200,
},
]
},

{
type:"ok_cancel",
}
]
}};
app.execDialog(dlg);
The cluster text can also be made bold by setting the font property to dialog and the bold property to true:
var dlg={description:{
elements:
[
{
type: "cluster",
align_children: "align_row",
elements:
[

{
type: "static_text",
name: "First Name:",
font: "dialog",
bold: true,
},

{
type: "edit_text",
width: 200,
},
]
},

{
type: "cluster",
align_children: "align_row",
name: "My Cluster",
font: "dialog",
bold: "true",
elements:
[
{
type: "static_text",
name: "Last Name:",
font: "dialog",
bold: true,
},

{
type: "edit_text",
width: 200,
},
]
},

{
type:"ok_cancel",
}
]
}};
app.execDialog(dlg);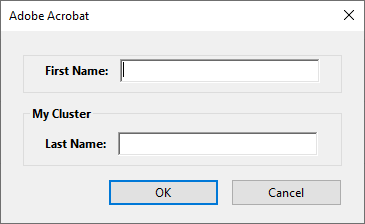
The order of the properties (type, align_children, name, font, bold) inside the object does not matter.
How To Make It Do Something
So far the focus has been on the appearance of the dialog and how to program specific elements. As mentioned in Part 1 of this series on popup dialogs, there are several other elements besides static text, text fields, and ok_cancel buttons that can programmed into the dialog. The Acrobat JavaScript Reference explains it all.
While the user can type in the First Name and Last Name fields in our sample dialog, it can only return ok or cancel. Next week I'll explain how to get input data out of the dialog to do something with it. See you then.